Dip you nails into the design clean the top of the water slowly pull your nail out remove tape clean up around the edges finish the design with a top coat. It is important that you allow the outer nail polish to dry before removing.
Make sure you take a toothpick to the excess nail polish in your cup or bowl while your nail is still submerged.
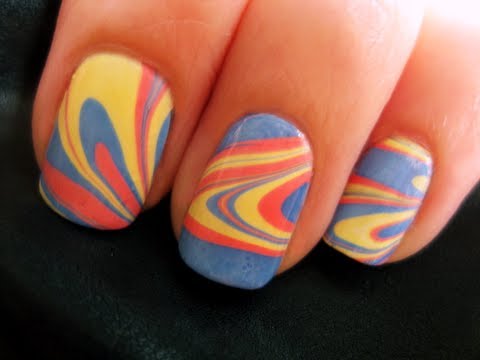
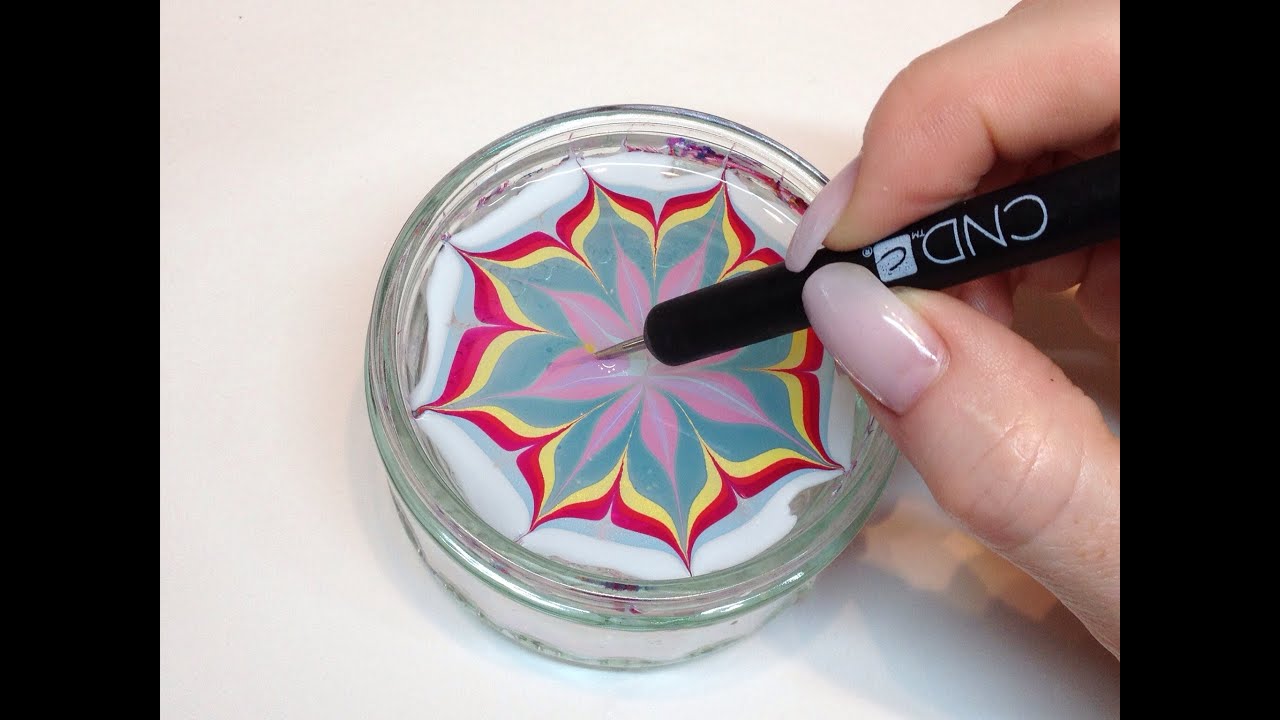
Nail art dip in water. To create a marble nail effect using water start by filling a cup with room temperature water and dripping 1 drop of nail polish onto the surface of the water. When done dip your nail into bowl wait a few seconds. Most of the marbled nail art requires you to dip your nails into the water.
Part 3 dip dyeing your nails. Paint the second darkest color right below the darkest color. Water marble nail art step by step using nails polish cnd lacquer by natasha lee how to product watermarbling nail art new improved video tutorial availa.
The process of removing your dipped nail extension is actually very similar to gel polish removal. One can reuse it too. The dip powder nails removal is way faster than the removal of traditional acrylic nails and will take you about 15 min.
One thing common to all those marbled nail arts is to dip nails into the water. One of the great things about dipping powders is the fact it is easy to remove. Dip your finger on the water where the nail varnish pattern is at a 45 degree angle.
However this one is slightly different. Once the polish spreads out into a circle place a drop of polish in another color on top and swirl a toothpick through the circle to create the marble effect. But this groovy style of marbled nail art is marginally different.
When you remove your finger from the bowl there should be no more excess polish. If you have more colors continue painting strips from dark to light. Its a little tricky at first somewhat messy and quite time consuming but dont let that put you off because the looks you can acheive are well worth the effort.
Create the art first let it dry and cut them up into sizes that will fit on your nails. If your base paint is light and you intend for the tips of your nails to be dark paint a stripe of your darkest nail color at the tip of the sponge. Groovy marbled nail art.
Get in on the nail art trend with this innovative tie dye technique. In such a type art is first created and then dried and later cut into sizes to make them fit on ones nails.


0 Response to "Nail Art Dip In Water"
Post a Comment