Discard the toothpick and gently take out the finger. Be sure that the tape dosent touch.
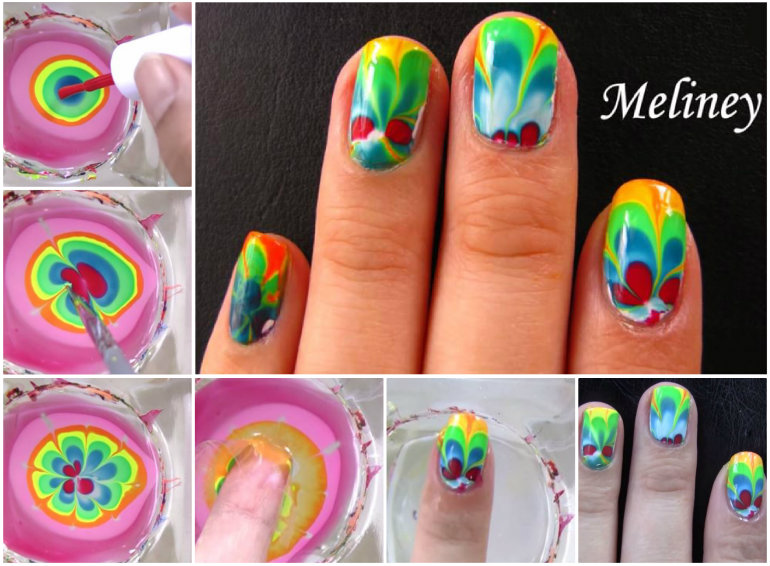
How to create a marble nail effect using water part 1 preparing the marbled water apply a base coat to your nails.

How to do nail art using water. Put the decal in the water bowl. Drop an alternate color into the center of the first color. Apply the basecoat color.
Take it out with tweezers and apply very carefully on your nails. Apply a top coat and your water marble nail art is done. Its all up to you.
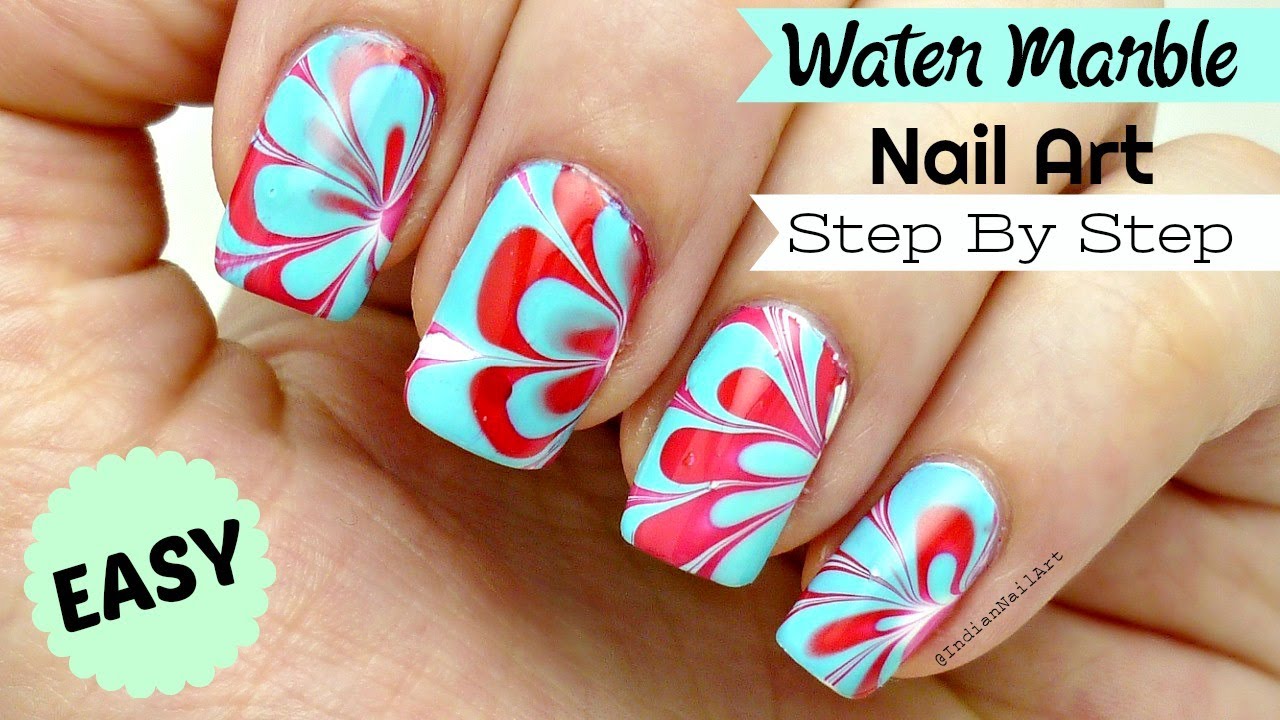
Marble nails are one of the latest trends for nail art designs. Paint your nails with the white nail varnish. Use a needle to swirl it around.
Once the base coat of your nail has dried use tape to aid in the clean up process. It also helps from removing polish from your nails when youre cleaning up. I recommend 2 coats.
Spray with fast drying spray if you want. Choose your nail polish. Choose a small cup.
Once done remove the tape and clean the skin around the nails with a q tip dipped in acetone. In this way theyre a little bit reminiscent of our snowflake nail art designsunlike snowflakes though marbled designs arent seasonal and you can do them anytime. Get the materials readya basecoat and two or three colors that blend well together.
This step will prevent you from getting any excess nail polish on your skin. Then dip your finger into the bowl of water. Add in drops of white and light pink nail polish into the bowl of water.
Theyre unusual unpredictable and no two designs are exactly alike. Use the back of a paintbrush for the round lemons and then dip a mechanical pencil in green polish to draw on the two leaves this is what makes it look more fruity and less like yellow polka dots. Put sticky tape around your skin and cuticles.
You can do all nails or alternate nails. Drip one color onto the water. This nail masterpiece is a lot easier to do than it looks.
Fill the cup with room temperature water. For full nail water decals you have to cut a piece equal to or a little larger than the size of your nails. If it is a little large leave the overlap as it is and dry off the water completely from your nails.
Water marble nail art step 1. Paint your nails with a clear base coat. Use a toothpick to.
Now drag a toothpick around the fingernail so that the remaining film sticks to it. Add color to the water. Repeat the process for marbling other fingers.
Wrap tape around your fingers under your nails so that you dont get nail polish on your skin. How to do nail art method 5 water marbled designs gather your supplies.


0 Response to "How To Do Nail Art Using Water"
Post a Comment