Coat the nail with pink nail polish. Step 6 add a topcoat.
You can repeat this step as many times as you need to.

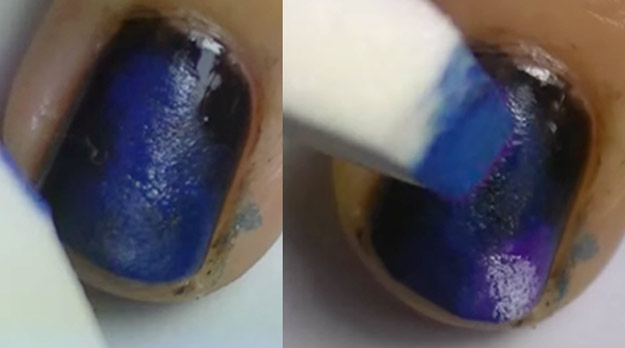
Sponge nail art steps. Rub the sponge delicately as soon as the base dries completely as to get pink and blue shades on nails. Before starting on your ombre design apply a layer of gloss or hardener to your nails. Ombre nail art tutorial step by step.
Or two or three. Because of this i. Keep dabbing lightly and moving it very slightly up and down your nail.
Slowly roll the sponge with the polish side down over your nail to the other side of your nail. Start by applying a base coat for preventing any nail damage. End the nail design with clear nail polish.
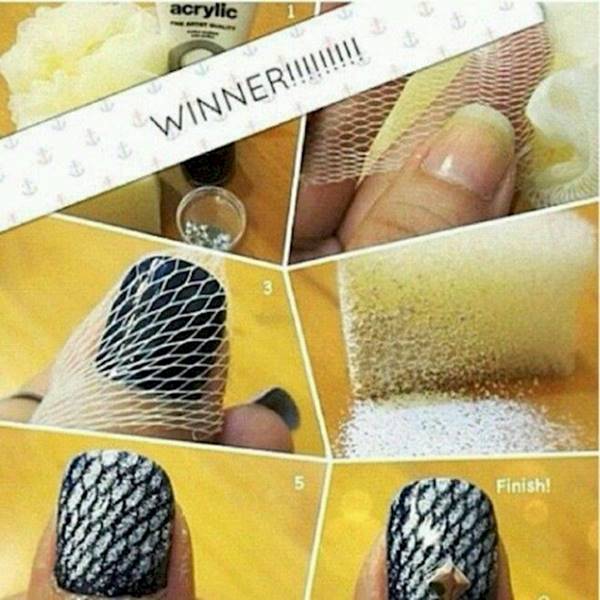
Another nail art tutorial that uses inexpensive striping tape which you can pick up at your local drug store beauty supply store or online shop this stars and stripes nail art technique is impressively easy. Do this repeatedly to darken the polish colors and increase the ombre effect. How to do ombre nails with a sponge 1.
You can find them here. Repeat this step to make a perfect finish. Roll the polish onto your nails.
Roll the polish onto your nails by placing the side edge of the sponge next to the side of your nail. I was thrilled to get such a great response to my sponged gradient nail polish tutorial but quite a few people didnt quite understand how to achieve the gradient results. Apply white nail polish in the middle finger ring finger and thumb.
Now its time to choose shades of nail polish that you like to create the ombre effect. If you have a french manicure tip that will work perfectly. In the rest two fingers apply yellow nail polish.
Sponge on the ombre hue in this case orange. Now draw 2 3 pineapples in the white background. Follow these steps to make nail design.
Here are some simple steps to follow for the nail art. Sugared stars and stripes nail art. Take a piece of sponge which has been immersed in pink light blue and dark blue nail colors.
Look at the texture of this at home manicure. Httpsamznto2j7nfik subscribe to cutepolish so you. Apply the circular guide onto your nails as shown in the photo.
Apply transparent nail color with glitter to get this sexy nail art. Pink and blue nail art. A useful trick to prevent staining your fingers while doing the ombre is to.
Step 5 dab the sponge directly down on to your nail. Fine nail art brush. Apply a base coat here i used yellow and let it dry.
In todays nail video we are testing out the new nail art sponge brushes for creating ombre gradient effects. You just apply that stuff to your finger around your nail and nail bed before you start applying your ombre sponge and when you are done you can literally just pull it off like elmers glue back in kindergarten and ta da. Just make sure each layer is completely dry before sponging again otherwise you will start smudging the underneath layers and ruin the whole thing.


0 Response to "Sponge Nail Art Steps"
Post a Comment