All you need is some polish and scotch tape. 32 amazing diy nail art ideas using scotch tape.
Lets check out some tips that would make your nail art process a little easier.

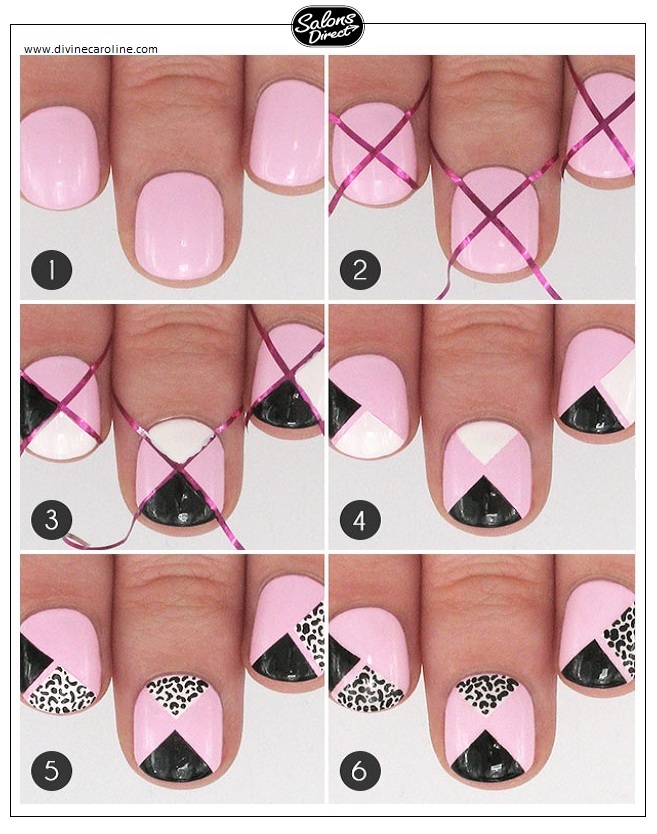
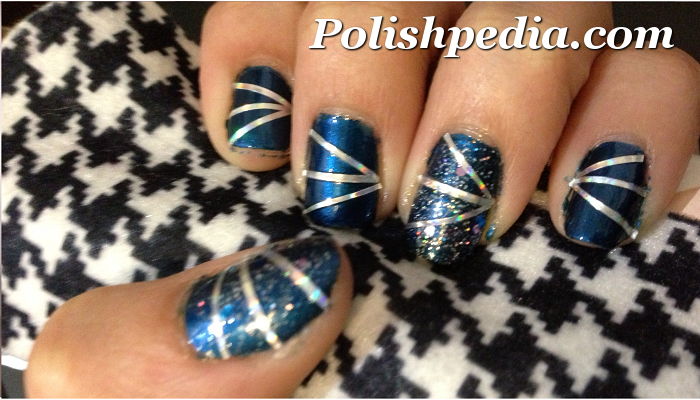
Tape nail art step by step. Step by step tutorial. Remember to do one nail at a time. This will give you more control.
If you are really bad at painting your nails this is the right place to be. I show you in my nail art tutorial step by step the technic of water marble. Nail art designs videos gel nail designs nails design new nail art cool nail art one stroke water marble nails pretty nail designs easy how to create a swirl nail art design.
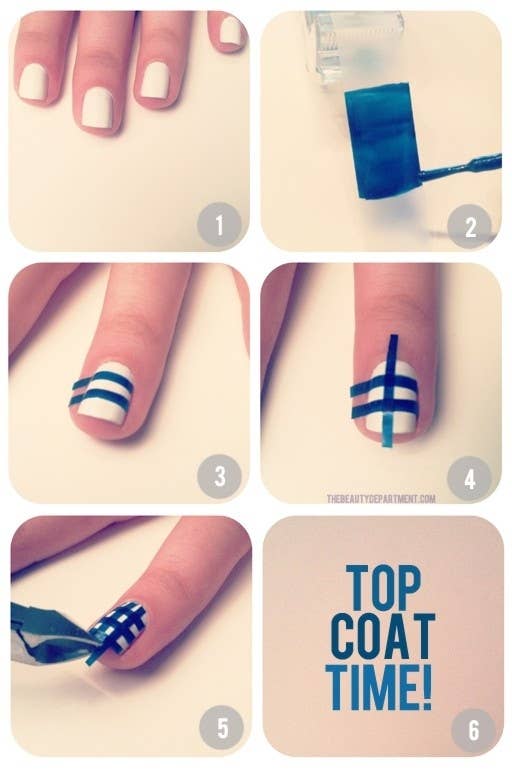
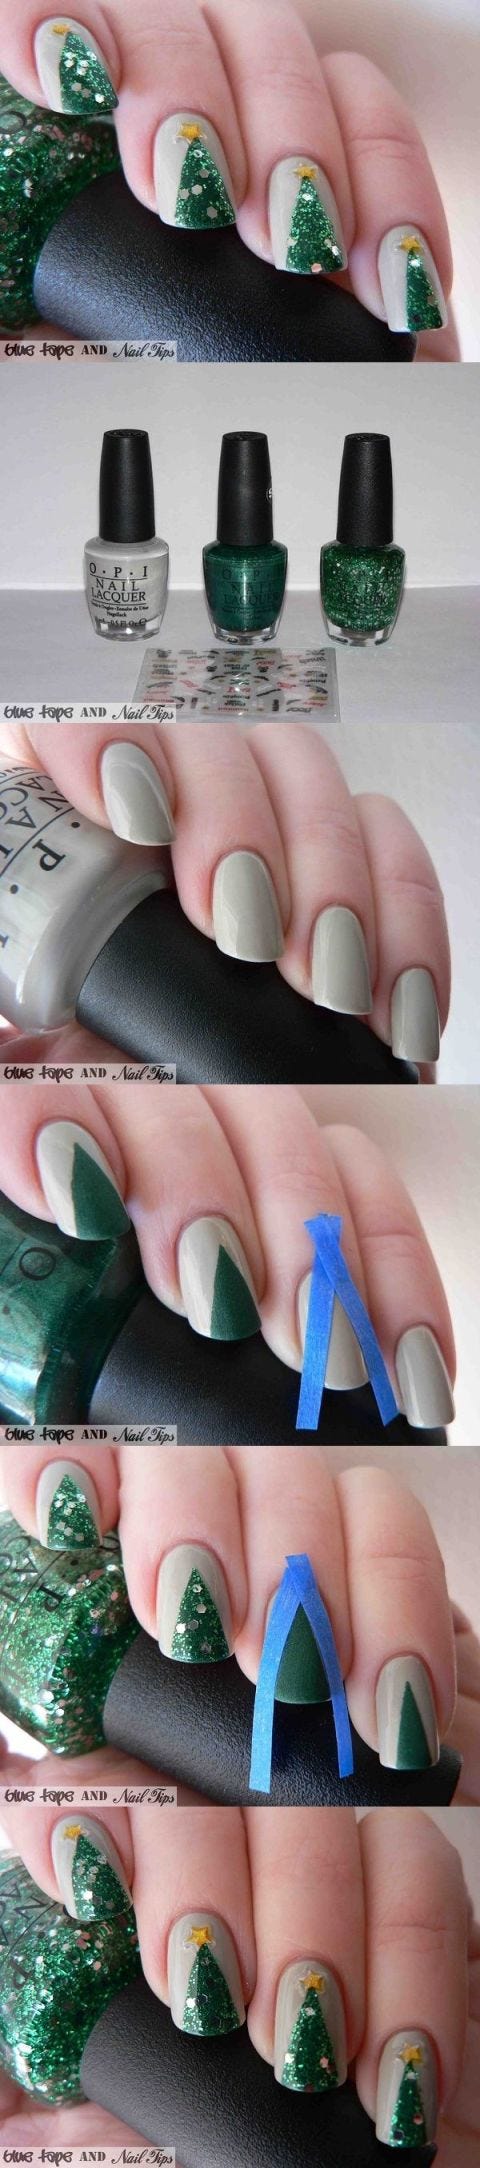
After applying your basecoat and letting it dry paint on your base color. Rounded hole nail art labels. Another nail art tutorial that uses inexpensive striping tape which you can pick up at your local drug store beauty supply store or online shop this stars and stripes nail art technique is impressively easy.
15 diy nail tutorials with scotch tape. Make sure to work on a flat surface and sit down while doing it. For your base paint your nails with a lavender nail polish.
Cut up all your tape up before painting your nails. With your pencil create a mark on the higher form of every nail staying as shut as the potential to the skins edge. Paste a little of washi tape on every nail of 1 hand.
Important tips and hacks to do nail art at home. Im going to show you 15 diy nail tutorials with scotch tape since i have started to adore nail art that uses a scotch tape. Most of the times people have an issue with keeping their hands steady.
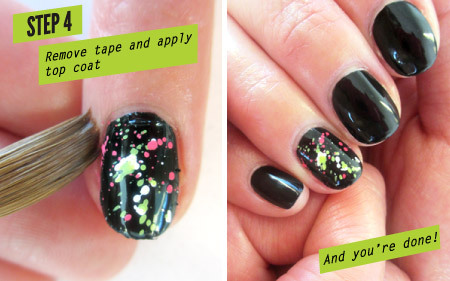
Remove the tape while the polish is still wet. Start off every washi tape portion and cut the u form simply created. Then position the tape on your nail and apply the next color.
Once it dries place two round nail art labels on either side of the nail leaving a gap at the center. Check that to remain smaller than the pencil mark. The great thing about using tape to do a design is that if youre not good enough at using your left hand when doing nail art when you put tape on it you dont have to worry about that.
After applying a base coat to protect your nails and a background polish get your scotch tape ready and lets make 5 cool but girly and cute nail art designs i explain these step by step nail. Yes thats right now you can do your nails in a perfect geometric shape just by the use of a simple scotch tape.


0 Response to "Tape Nail Art Step By Step"
Post a Comment